How To Mill Your Own Flour At Home- Let’s answer the What, Why, and Hows of milling your own flour and baking with it! This will cover some information about fresh milled flour in general, what types of mills there are, where to buy wheat berries, how to make bread, and other common questions!

Table of Contents
- What Is Fresh Milled Flour?
- Benefits of Fresh Milled Flour
- What Do I Need To Mill My Own Flour
- Mill Recommendations
- What Wheat Berries Should I Start With?
- Where Can I Buy Wheat Berries and Other Grains?
- How Do I Store Wheat Berries?
- How Many Wheat Berries To Make A Cup of Flour?
- How To Tell If My Dough Has Risen Enough?
- How Do I Know If My Bread Is Done Baking?
- What Is A Windowpane Test?
- Help! I Followed Measurements Exactly and My Dough Is Too Wet/Dry.
- How To Store Homemade Bread
- Beginner Recipes
What Is Fresh Milled Flour?
Fresh milled flour is made by grinding the wheat berry into flour right before use. It is also referred to as fresh ground flour.
Benefits of Fresh Milled Flour
- Improved Digestion
- Better Flavor
- No Additives or Preservatives
- Contains more vitamins, minerals, and antioxidants than store-bought flour.
- Provides soluble and insoluble fiber.
- Lower Glycemic Index
- Know exactly what you’re eating and where you source your grains.
- Buying In Bulk = Savings
Why Is Fresh Milled Flour Better For You?
With fresh milled flour you are getting out exactly what you put in your home mill. This means you are getting the whole food and all parts of the wheat berry: the bran, germ, and endosperm. You are also getting all of the natural nutrition that comes with it. Did you know that store-bought flour (unless stated otherwise) is bleached, bromated, and enriched with synthetic vitamins? Without the germ and the bran flour is missing key nutrients such as Iron, Magnesium, Selenium, B Vitamins and Fiber. This is why they have to add the synthetic versions back in and as most of us know, it’s usually never as good as when it is found naturally.
Fresh milled flour contains 40 of the 44 essential nutrients that we need to survive. These include the following:
Vitamins: B vitamins (thiamine, riboflavin, niacin, folate), vitamin E, and vitamin K.
Minerals: Iron, magnesium, phosphorus, potassium, zinc, and selenium.
Fiber: Fresh milled flour is a great source for fiber, which is important for maintaining digestive health, reducing the risk of chronic diseases, and promoting feelings of fullness.
Antioxidants: Wheat berries contain the following antioxidants: Quercitin, Kaempferol, Myricetin, Phenolic Compounds (good for heart health), Omega-3 Fatty Acids, and Vitamin E.
Healthy Fats: Overall wheat berries are low in fat, but do contain unsaturated, including polyunsaturated and monounsaturated fats which are good for heart health.
If you have time you should definitely watch Bread of Life by Sue Becker! She covers so much information and is the reason I am milling my own flour.
What Do I Need To Mill My Own Flour?
You are going to need a grain mill to mill your own flour at home. There are two types: manual or electric. If you’re like me you are going to want a backup in case of an extended power outage, but an electric one for quick convenience. If you’re going to be baking often you will definitely want an electric mill. Getting fine flour from a manual one will gain you muscle and make you understand why they had so many kids back in the day. It made us laugh when my husband and I manually milled our flour before purchasing an electric mill, we joked that if we had 10 kids they could all take 5 minute turns at the mill.
You are also going to have to decide if you want a stone burr, steel burr, or impact grain mill.
Stone Burr: Stone Burr mills can produce very fine flour all the way up to cracked grain. Quality modern mill stones are long lasting, cool-grinding, and never contribute grit to your flour. Stone burr mills grind all dry grains and beans. They aren’t suitable for wet or oily ingredients such as nuts or oily seeds such as flax or poppy. Also note that they are quieter than impact mills.
Steel Burr: Steel Burr mills are fairly quiet and can produce very fine flour all the way up to cracked grain. They can also mill wet or oily grains or seeds since they are non-pourous.
Impact (micronizer): Impact mills are going to be the loudest out of the 3 options. They essentially create flour with stainless steel fins. The fins which never touch each other, spin at tens of thousands of revolutions per minute and burst grain kernels into small pieces as they’re impacted. This is a good option if you only want flour and are looking for something more budget friendly. Impact mills flour consistency ranges from very fine to coarse, but not giving you the option for a cereal grind or cracked grain. Keep this in mind if you want to make cream of wheat or other fresh cereals.
Mills I Have Personally Used
For electric mills I’ve personally used a Nutrimill Classic, Nutrimill Harvest, and Komo Mio. Out of the 3, I prefer the Komo Mio. It yielded the finest flour and you can adjust coarseness to do hot cereals and cracked grains if needed. It also has a 12 year warranty! Out of the manual mills I have only used the Wondermill Jr. at this time.

The KoMo Mio is the mill I have loved the most out of the ones I have personally tried! It is great for small or large amounts of on demand milling. You can put any bowl that fits underneath (stick with glass or metal to avoid static which can make it dusty). It produces very fine flour or you can easily adjust to a more coarse mill if you need it for other recipes. The only con is they go in and out of stock, but they are worth the wait, so pre-ordering is advised! It also has a 12 year warranty.

The Nutrimill Classic is the electric mill I started with. It is budget friendly and yields fine flour. When I started milling I only had flour on my mind and didn’t think about ever wanting a coarse or cracked texture for hot cereals. If you are going to purchase this use code: FRESHMILLEDMAMA for $20 off of your purchase.

The Nutrimill Harvest is a very popular Mill option. It looks nice and a lot of people love it, but for me personally it didn’t give as fine of flour as the KoMo Mio. If you are going to purchase this use code: FRESHMILLEDMAMA for $20 off of your purchase.
*If you already own a Nutrimill Harvest and having trouble getting a really fine flour you can do a coarser grind and then run it through again on the finest grind.

The Wonder Junior Deluxe+ Grain Mill is a great mill to have on hand if you are off-grid or want something in case of a power outage. It comes with stainless and stone burrs. You can grind grain with the stone burrs and make peanut butter with the stainless burrs (which I want to try so bad, but haven’t because I’m not looking forward to cleaning the peanut butter off of the burrs). You can adjust the burrs for very fine flour up to cracked grains. Just note the finer the flour, the closer the burrs, and the harder it will be to turn the handle. There are also motorizing options available.
Hopefully this was helpful as a start to looking into mills. Ultimately, you are still going to want to do your own research to see what is right for you and your family. Here are a few more well known and well liked mill options below. (Remember to use code: FRESHMILLEDMAMA for $20 off if purchasing through Nutrimill.com):


Commonly Asked Questions
What Kind of Wheat Berries Should I Start With?
The main wheat berries I would recommend when starting are hard white wheat and soft white wheat berries. These are the most commonly used in baking. Hard white wheat berries have a higher protein content (typically between 10 and 14 percent protein). This is good for making yeast breads, buns, rolls, pasta. Soft white wheat berries have a lower protein content (typically between 8.5-10%). This is good for cookies, quick breads, cakes, biscuits, muffins, pie crusts, and tortillas.
There are a handful of other grains available and some behave differently when kneading so you’ll want to be mindful of that. Some of the other common grains are: einkorn, spelt, khorasan (also known as kamut), emmer, and durum(known as semolina once it is milled).

Where Can I Buy Wheat Berries and Other Grains?
If you have a local Amish/Mennonite community near you with a bulk food store they may carry them or be able to order them for you. If you don’t have that option, there are a good handful of options online. I will include them below.
Palouse sells a Burlap Wheat Pack that includes a total of 20lbs. of hard white, hard red (spring), hard red (winter), and soft white wheat berries. This is a great option if you’re not sure what to start with.
Azure Standard offers shipping, but it is pretty pricey, so the best option with using Azure is if you have a local drop. When you place an order through a local drop you will get info from the drop coordinator along with emails from Azure that inform you when the truck will be in your area with your order. This works great for a lot of people, but if you don’t have a flexible schedule it may be an inconvenience for you.


How Do I Store Wheat Berries?
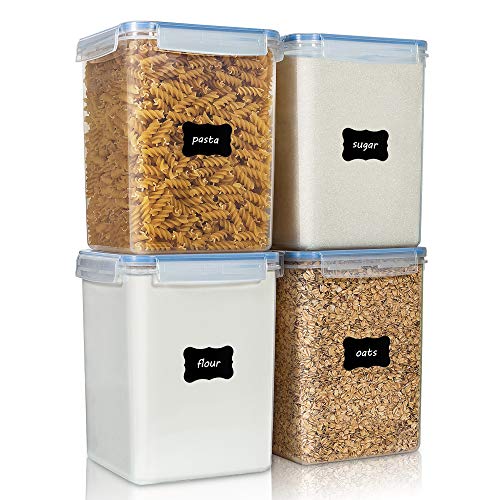
Short-Term Storage: If you are buying small amounts that you are going to use fairly quickly then you can store them in any airtight container in a cool, dry, dark place. Some ideas are glass mason jars, airtight plastic containers, gallon glass jars from Azure, or 5 gallon food grade buckets with a gamma seal lid. *Just note that gamma seal lids are nice for using on a bucket that you are in and out of often, but not for long-term storage. I generally keep a 5 gallon bucket of hard white and hard red out for everyday use (I bake A LOT) and like having the gamma lids on those just for ease of access.

Long-Term Storage: When you are buying wheat berries in bulk the most common option is to store them in 5 gallon buckets lined with a mylar bag and an oxygen absorber. A lot of people ask if they need to use a mylar bag if using a food grade plastic bucket. If you want a completely airtight storage solution for your wheat berries, yes. Air can still pass through a plastic bucket, although the amount depends on the type of plastic and the quality of the seal. I really like this Pack of 5 Gallon Mylar Bags that come with oxygen absorbers and labels. You can find 5 Gallon food grade buckets on Amazon, Azure Standard, local farm stores, or even sometimes bakeries give them away!


Baking FAQs
What Temperature Should My Water Be?
The ideal temperature when making bread is room temperature (somewhere between 70-78F). If the recipe calls for warm water, I generally use 90-100F temp. water. Don’t go much over 110-115F because this will kill your yeast and then you won’t get a rise on your bread.
How Many Wheat Berries To Make A Cup of Flour?
This is going to vary for different grains. You are also going to see more consistent results if you use a kitchen scale versus just measuring by cups. This is because everyone measures their flour just a little different and can be inconsistent depending on how tightly packed the flour is in the measuring cup.
1 cup of Soft White Wheat Flour is approximately 96 grams. This may vary depending on the baker, but I base this off 1 cup of soft white wheat berries being approximately 192 grams and when you mill about 1/2 cup of soft white wheat berries you get about 1 cup of milled flour. I was always taught to not pack your flour when baking. I lightly whisk or spoon the flour in its container to aerate it before measuring. Then use a spoon to gently scoop the flour into your measuring cup, then use a straight edge (like a knife or flat spatula) to level off the top.
1 cup of Hard White Wheat Flour is approximately 135 grams. If you are using measuring cups then 2/3 cup of hard white wheat berries will yield approximately 1 cup of milled flour.
How To Tell If My Dough Has Risen Enough?
For your 1st rise your dough should double in size. This will take about 45-60 minutes. This will also vary on the temperature in your home.
For your 2nd rise done in the loaf pan you can perform a “poke test”. For this, lightly oil or flour your finger and gently press your dough down about an inch. If the indentation slowly springs back, the dough is ready to bake, while a quick rebound indicates it needs more time to rise, and if the indentation remains, it’s overproofed and should be baked immediately. *Be careful if your dough seems super airy with a tight top that looks like it might pop if you poke it, I would recommend just baking it as it’s on the edge of overproofing.
As you bake you will get a feel for how your dough should feel and look.
Do I Have To Have A Stand/Electric Mixer To Make Bread?
A stand mixer is not required to make homemade bread. It is very handy if you are regularly making bread for your family, though! If you are going to stick to sourdough that’s even easier. When I started making bread with fresh milled flour for my family I was using a KitchenAid stand mixer. It got warm very quickly and sometimes smelled “hot” and I was scared I was going to burn up my beautiful mixer. I ended up selling it to upgrade to a Bosch Universal Plus Mixer. It wasn’t as pretty, but it is a workhorse and does an amazing job with fresh milled flour without struggling.
In the fresh milled flour world the 2 most popular mixers are the Bosch and the Ankarsrum Mixer. I don’t have personal experience with the Ankarsrum mixer. From what I have read it is great, but some people mention that it can take longer to achieve a windowpane. You’ll have to do your own research to determine what you want to go with, but with either you can’t go wrong. There is a pretty loud crowd for both “Team Bosch” and “Team Ank”.
What Is A Windowpane/Stretch Test?
A “windowpane test” or “stretch test” for dough is a method used to check if the dough has been kneaded enough. This is done by stretching a small piece of dough until it becomes thin and translucent, allowing light to pass through it like a windowpane. If the dough tears easily, it needs more kneading.
How Do I Know If My Bread Is Done Baking?
Bread is usually done when it has a nice golden brown crust, sounds hollow when tapped. If you have an instant read thermometer you can check the center and it is done when it is 190F.
If you are baking soudough bread you will be looking for an internal temperature of about 210F.
How Do I Know If I Have Enough Flour?
When you are using a stand mixer to knead your dough it should pull away from the sides of your bowl when you have enough flour. If the dough is still sticking significantly to the sides, you may need to add a little more flour.
Help! I Followed Measurements Exactly and My Dough Is Too Wet/Dry.
Ok, this happens sometimes. A recipe is like a guide, but sometimes it can slightly vary due to the moisture content in wheat berries, temperature outside/inside, humidity, elevation, different ovens, etc. If your dough seems too dry, you can slowly add in water to get it to the desired consistency. If your dough seems too wet, you can slowly add in flour to get it to the desired consistency. In most cases you can salvage your dough by doing this.
How To Store Homemade Bread
Plastic Bread Bags are a great way to store your bread. They are pretty cheap to buy a bulk package of them. These are the best ones that I’ve found on Amazon. The plastic bag also makes it easy to gift to friends and family and look a little more “bakery” style than a regular ziploc bag.
I personally use the 21.1 Cup LocknLock Storage containers. I bought two to rotate with my baking. They fit my long sandwich loaves baked in the Large Pullman Loaf Pan perfectly!

If you want to avoid plastic, eat your bread within a day or two, or want to use a cute bag to gift a beautiful loaf to friends or family then try using a linen bread bag. I wouldn’t recommend it for long-term storage though, because they aren’t airtight.
This one is another eco-friendly option for storing bread. I have not personally used these, but people seem to really like them and say it helps keep their bread and other baked goods fresh. They also seem to be more “airtight” than the linen bags listed above.
Should I Store Homemade Bread In The Fridge Or Freezer?
If you’re not going to store your bread at room temperature I’d recommend fully cooling (to avoid soggy bread when thawing), pre-slicing and storing it in the freezer. That way you can pop a slice from the freezer directly into the toaster.
You can store it in the fridge. Just know that it will change the texture more than freezing. The cold air in the fridge will draw out the moisture leaving it dry and crumbly.
To store in the freezer: wrap your loaf tightly in plastic wrap, followed by a layer of aluminum foil or freezer paper to keep it as fresh as possible for up to 6 months.
Join The Fresh Milled Flour Recipes Group on Facebook!
The Fresh Milled Flour Recipes group is a great place to connect with others baking with fresh milled flour, get your questions answered, and share pictures of your fresh milled flour baking goodies!
Great Beginner Recipes Using Fresh Milled Flour

Soft Sandwich Bread
This is a great recipe for beginners and is also a great option if you have kids or other family members who don’t totally enjoy the flavor of fresh milled flour yet. This recipe gets it’s softness from sunflower lecithin and vital wheat gluten (gluten flour).

Chocolate Chip Cookies
These are the best chocolate chip cookies! The edges are slightly golden with a slight crisp and the middle is soft and chewy with no chilling required!

Cream of Wheat
This is an easy classic! If you want to make cream of wheat you will want to consider a mill that can adjust for more coarse grains/cracked grains.

Pizza
This is the best homemade pizza dough made with fresh milled flour! It is perfectly chewy, and has a flavorful crust. It can be made right away, refrigerated up to 3 days, or frozen to pull out and enjoy later!

This post contains affiliate links, which means I make a small commission at no extra cost to you.